Once you receive an Invitation to Apply (ITA), the official PR Canada application step begins, and you usually have only 60 days to complete it. This is when you must submit an electronic Application for Permanent Residence (eAPR) along with all the supporting documents for the information already declared in your Express Entry profile. This guide walks through each section of the eAPR application, the documents to prepare, and the deadlines you must not miss.
The Invitation to Apply (ITA) is the result of your Express Entry profile’s CRS score exceeding the cut-off in a round of invitations. However, the ITA is only an invitation. You must prove every factor declared — age, education, work experience, language proficiency — with real supporting documents in the eAPR before you can be granted permanent residence.
Understanding the 60-Day Deadline After Receiving Your ITA
As soon as you receive the ITA, the countdown begins. You have 60 days from the date of the invitation to submit a complete PR Canada application through your online account. This is a hard deadline, not an estimate.
If you miss the deadline without submitting, the invitation will expire. Your Express Entry profile will then return to waiting status, and you will have to wait for a later round of invitations — if your CRS score is still competitive enough. So, as soon as you see the ITA, the first thing to do is review all your documents to see if they are ready.
You can decline the invitation if you feel you are not ready in time. When you decline, your profile returns to the candidate pool and keeps the same score and profile creation date. This is a safer choice than submitting a rushed application with missing documents.
Preparing Documents Before Submitting Your PR Canada Application
Most of the 60 days will be spent gathering documents, not filling out the application. Therefore, you should start this as early as possible, ideally as soon as you create your Express Entry profile rather than waiting until you receive the ITA.
Below are the core documents that most eAPR applications require:
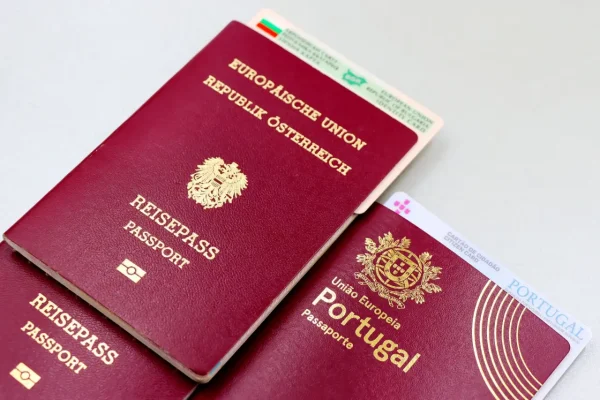
- Passport still valid, for the principal applicant and each accompanying family member.
- Language test results (IELTS General Training, CELPIP, or TEF/TCF for French) still within the 2-year validity period.
- Educational credential equivalency assessment (Educational Credential Assessment) if you are using education obtained outside Canada to calculate your score.
- Work experience reference letters from the employer, clearly stating job title, NOC code, duration, hours worked and duties.
- Proof of funds (settlement funds) if required by your category.
- Birth and marriage certificates and civil status documents for family members.
Each document must match exactly the information declared in your Express Entry profile. If there is a discrepancy — for example, the job title in the employment confirmation letter does not match the NOC code selected — the reviewing officer may raise doubts and request further explanation.
Obtaining a Police Certificate
One of the most time-consuming documents is the police certificate. You need to obtain this document for every country where you have lived for 6 months or more continuously, since the age of 18.
For Vietnamese nationals, this is Judicial Record Card No. 2 issued by the Department of Justice or the National Center for Judicial Record. If you have lived in a third country (for study or work), you must also obtain that country’s certificate according to its own regulations. The process and issuing authority for each country are detailed on the website of Immigration, Refugees and Citizenship Canada.
Since issuance procedures in Vietnam can take a few weeks, you should apply for your police certificate as soon as you receive the ITA, in parallel with preparing other documents. Do not let this step become the final bottleneck that delays your whole application.
Medical Exam and Biometrics
Besides documents, you need to complete two mandatory procedures: the medical exam and biometrics.
The medical exam must be conducted by a designated physician (panel physician) on IRCC’s list, not a hospital of your own choosing. Many people opt for an upfront medical exam right after receiving the ITA so they already have a confirmation number to include in their application. Exam results are generally valid for 12 months, so be careful not to have the exam too early.
Biometrics involves fingerprinting and a photo. After you submit your application and pay the fees, the system will send a Biometric Instruction Letter. You bring this letter to a designated collection point to complete the process. So the usual order is to submit the application first, then go for biometrics according to the instruction letter.
Filling Out and Reviewing Your Online eAPR
Once your documents are nearly complete, log into your online account to start filling out the eAPR. The system uses your Express Entry information to pre-generate the forms and a document checklist specific to your application.
The typical sequence for submitting a PR Canada application via the eAPR is as follows:
- Log into your account and open your active invitation.
- Complete the forms for personal information, family, education and work history.
- Upload each document into the correct field on the document checklist, in the required format.
- Declare and confirm information for each accompanying family member in the application.
- Electronically sign to confirm the declared information.
- Pay the fees according to IRCC’s current fee schedule.
- Click submit to lock and send the entire application.
In addition, you should carefully read the notes under each document upload field. Some fields require combining multiple documents into a single PDF file, while others accept only one specific type of document. Uploading to the wrong field is a common mistake that causes an application to be returned for additional information.
Regarding fees, a permanent residence application includes the processing fee and the Right of Permanent Residence Fee. The specific amounts change over time, so you should check the exact figures according to the current fee schedule published on the Immigration, Refugees and Citizenship Canada (IRCC) website before paying.
What Happens After You Submit Your PR Canada Application
After you click submit and complete payment, your application moves to processing status. You will receive an Acknowledgement of Receipt in your account. This marks the point where your application has entered the review queue.
Next, the system sends a letter with instructions for biometrics if you have not yet completed this step. During the review, the officer may send additional requests for documents or clarification. Therefore, you should check your account and inbox regularly so as not to miss any request that has a response deadline.
If the application is approved, you receive a Confirmation of Permanent Residence letter and a permanent resident visa if you belong to a group that requires one. Upon entry or during the confirmation procedure, you officially become a permanent resident of Canada. This is the outcome the entire eAPR process is aimed at.
Common mistakes when submitting a Canada PR application
Many applications are delayed or returned not because the applicant lacks the required qualifications, but because of errors in preparation and submission. You should check the following points before clicking submit.
- Employment reference letters that lack sufficient detail — missing the NOC code, weekly working hours, or job duty descriptions.
- Language test results or credential assessments that have expired relative to the submission date.
- Missing a police certificate from a country where you lived for more than 6 months.
- Information in the eAPR that does not match the Express Entry profile created earlier.
- Uploading documents into the wrong field trong document checklist.
- Submitting right at the 60-day deadline leaving no time to fix things if a gap is discovered.
In addition, you should pay attention to consistency across documents. Names, dates and job titles must match on every document. Even a small difference in how a name is written between your passport and your diploma should be explained with a supporting document, rather than leaving the officer to guess.
Summary
Submitting a Canada PR application after receiving an ITA is a stage that requires discipline in timing and accuracy of documents more than complex knowledge. The core principle is: start gathering documents as early as possible, keep all information in the eAPR consistent with your Express Entry profile, and do not let the police certificate or medical exam become the final bottleneck.
Your next step is to make a list of documents that matches the document checklist the system generates, mark the items that take a long time such as the police certificate and credential assessment, and handle those first. Once all documents are ready and consistent, filling out and submitting the eAPR will go quickly.
If you would like your eAPR reviewed before submitting, My Second World’s team of immigration consultants can accompany you to help avoid unfortunate mistakes during this critical 60-day window.